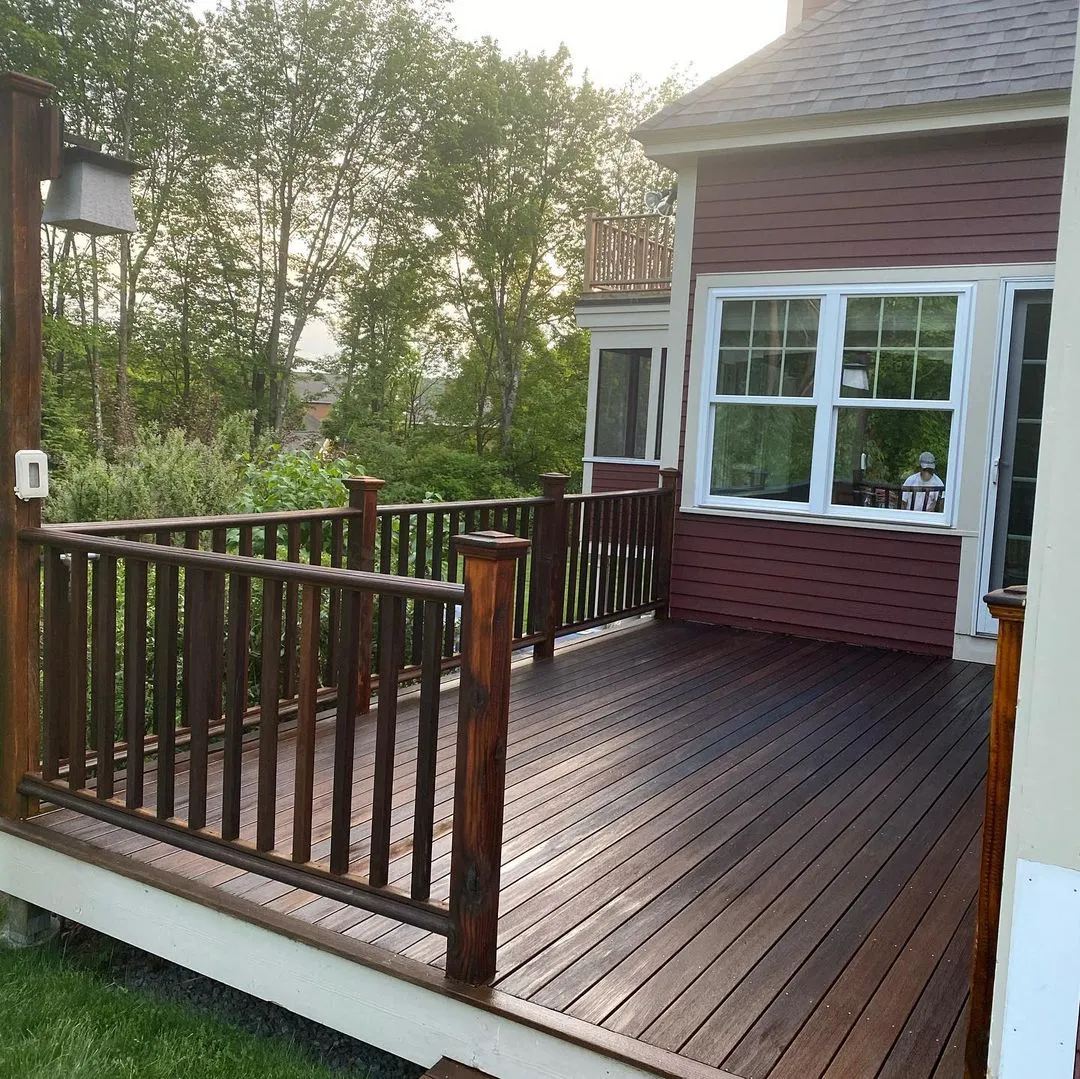
Deck stain opacity should be chosen in relation to the boards already in place. A deck with uniform new lumber presents a different appearance question from one with weathered boards and replacements. Inspect the existing finish and repairs before deciding how much grain and variation you want to remain visible.
Compare representative samples across more than one board condition. A transparent appearance will not conceal every repair or old discoloration, while a more opaque system changes the character and maintenance approach. Verify that the selected product is intended for the actual deck surface and compatible with what remains beneath it.
Record the approved system and sample rather than only a color name. Plan preparation and application consistently, and leave enough time before foot traffic and furniture return. During inspection, distinguish natural board variation from application problems. A realistic opacity choice begins with the wood you have and the result you can maintain, not just the most attractive display sample.
Choose stain opacity with the existing surface in mind
Stain opacity controls how much wood variation remains visible. A more transparent appearance emphasizes grain and differences between boards, while a more opaque finish covers more of that variation. Product terms differ, so compare actual samples and technical information instead of assuming that two manufacturers use the same labels in the same way.
Start with the surface you have. Existing coatings, weathering, repairs, and mixed boards influence what a new stain can achieve. Moving to a more transparent result may require substantial preparation and may not be practical for every substrate. Do not expect a transparent coat to hide filler, previous paint, or uneven discoloration.
Evaluate the sample after the full system has dried. Consider appearance alongside maintenance requirements and suitability for the exposure. A deck floor, a fence, and interior furniture may require different products even when the color looks similar. Keep the final choice specific: manufacturer, product, opacity, color, and intended surface. That record helps avoid an incompatible substitution when only part of the work needs attention later.
Identify the wood and its previous finish
A stain result depends on the material underneath it. Solid wood, veneer, engineered panels, and factory-finished components may need different treatment. Look for manufacturer information and examine concealed edges where appropriate. Do not assume that every surface with a wood pattern can be sanded or stained like solid lumber.
Find out what finish is already present. A penetrating stain, a clear film, paint, wax, and an unknown furniture polish can affect the next system differently. If records are unavailable, use a cautious assessment and a representative test rather than choosing a remover by guesswork. Thin veneers and delicate profiles can be damaged by aggressive preparation.
Note repairs and mixed materials. A replacement board or filled area may accept color differently from its neighbors even after careful preparation. Decide whether visible variation is acceptable before choosing the finish. Record the findings and the approved sample. Identifying the actual wood and previous coating helps turn stain selection from a color-card exercise into a realistic plan for the piece or structure you have.
Test stain on representative wood, not just a color card
The same stain can look different on different boards. Species, grain, previous treatment, weathering, and preparation all affect absorption and appearance. Use an inconspicuous part of the actual piece or a genuinely matching sample when possible. A store display gives a direction, but it cannot show every characteristic of your wood.
Prepare the trial exactly as the project will be prepared. Changing the sanding sequence or skipping a planned conditioner can change the result. Include the intended topcoat where the system requires one, since a clear finish can alter the final appearance. Follow all product directions for application, excess removal, and evaluation time.
Compare the dry sample in the light where the finished surface will be seen. Look at both broad color and local variation around grain, end grain, and repairs. If several boards are involved, sample more than one representative condition. Keep the approved piece or location available during application. It becomes a practical reference for consistency, while allowing for natural differences that no transparent finish can completely erase.
Inspect a deck before treating its appearance
Begin with the deck’s condition, not the stain color. Check accessible boards, steps, rails, fasteners, and areas near the building for visible damage or looseness. If anything seems unstable, soft, or structurally questionable, have it assessed before cleaning or finishing. A new coating cannot make an unsafe component sound.
Look for places where water or debris collects, including under planters and furniture. Note differences between shaded sections, open areas, and covered portions. These conditions can affect preparation and maintenance. Identify the previous coating if possible, because compatibility and removal needs influence the project more than a color card does.
Define the included surfaces: walking boards, risers, railings, posts, lattice, and exposed ends may not all be part of the same estimate. Decide how people will enter the home while the deck is unavailable. Once repair and access issues are resolved, follow the selected product’s preparation and moisture requirements. Keep inspection notes for later maintenance so the same vulnerable areas receive attention before deterioration becomes widespread.
Prepare wood consistently across the whole surface
Uneven preparation can produce uneven stain even when the application is careful. Establish the appropriate cleaning and preparation sequence for the wood and selected product. Remove contamination with a compatible method, and assess existing coatings before sanding or stripping. Unknown or older finishes may require specialized evaluation before disturbance.
Where sanding is appropriate, use a consistent sequence and follow the grain and manufacturer guidance. Do not overwork one spot while leaving another comparatively rough. Edges, profiles, and thin veneers need particular care because material can be removed quickly. Remove preparation dust using a suitable controlled method before applying the finish.
Inspect the bare or prepared surface in angled light. Scratches, glue residue, and compressed areas can become more visible after staining. Use a representative test to check the result before treating the whole piece. If preparation changes halfway through the job, make a new sample rather than assuming the color will remain identical. Consistency begins before the stain container is opened and is difficult to recover through heavier application afterward.
Make a daily exterior go-or-wait decision
Before each exterior stage, compare the actual conditions with the selected product’s technical requirements. Check the substrate, the planned elevation, and the drying period ahead. Shade, sun, dew, and overnight changes can make today’s suitable working area different from yesterday’s even when the general forecast sounds similar.
Agree in advance on who decides to postpone or move to another section. A weather delay should not lead to shortened preparation or an application outside the product’s limits. Keep complete boards, panels, or elevations in mind when choosing stopping points, so an interruption does not create an awkward visual boundary.
Review recently washed or previously wet areas separately. Their readiness should be established through the relevant material and coating guidance, not inferred from a dry-looking face. Record unusual conditions if they may help explain later performance. The purpose of a daily check is to connect the schedule to the real surface and finish system. It avoids treating a seasonal label, a warm afternoon, or a promised completion date as proof that all conditions are acceptable.
Apply deck finishes with a usable exit route
Plan the application sequence before the first board is coated. Decide where materials will sit, how sections will connect, and how you will leave without crossing wet finish. Stairs, gates, and doors can turn a seemingly simple deck into a difficult access problem. Keep the route unavailable to people and pets until the product allows use.
Follow the finish manufacturer’s instructions for tools, coverage, and maintaining a working edge. Work along complete boards or another suitable natural boundary where practical. Avoid puddles and accumulations around fasteners, board ends, and recessed details. A thicker layer does not automatically provide more protection and may create uneven appearance or drying problems.
Watch conditions as the work moves across sun and shade. Stop when the surface or weather no longer meets the product’s limits. After the required drying period, inspect transitions and edges before returning furniture. Follow separate guidance for foot traffic and heavier objects. Record the system and completion conditions so future maintenance can be planned around the actual finish rather than a guessed annual schedule.
Maintain stained surfaces according to their exposure
Stained surfaces need observation as well as cleaning. Check where sunlight, standing objects, water, and abrasion concentrate. A horizontal deck board may show wear sooner than a sheltered vertical rail, even when both received the same product. Use those differences to guide inspection rather than assuming every component needs identical treatment at the same time.
Clean with methods compatible with the finish and substrate. Avoid introducing a strong cleaner or pressure setting simply because the surface is outdoors. Remove debris that holds moisture, and keep furniture or containers from scraping or trapping water against the finish. Follow the product’s instructions before applying any maintenance coat.
Before recoating, identify whether the existing finish is sound, worn, or failing. Those conditions may require different preparation. A maintenance coat over loose or incompatible material can create a larger problem. Save the original product records and a photograph of the approved color. If a replacement product is necessary, verify compatibility and sample the result rather than treating a similar color name as proof that the systems are interchangeable.
Planning your next step
Use the inspection notes and sample decisions from this guide to describe the work you want completed. Bring photographs of uncertain areas and list the surfaces that should be included before comparing estimates. For broader background, read our How to Stain Wood the right way, or review AK Painters Pro Corp.’s services.
When you are ready to discuss the scope, request a free estimate. Related reading: