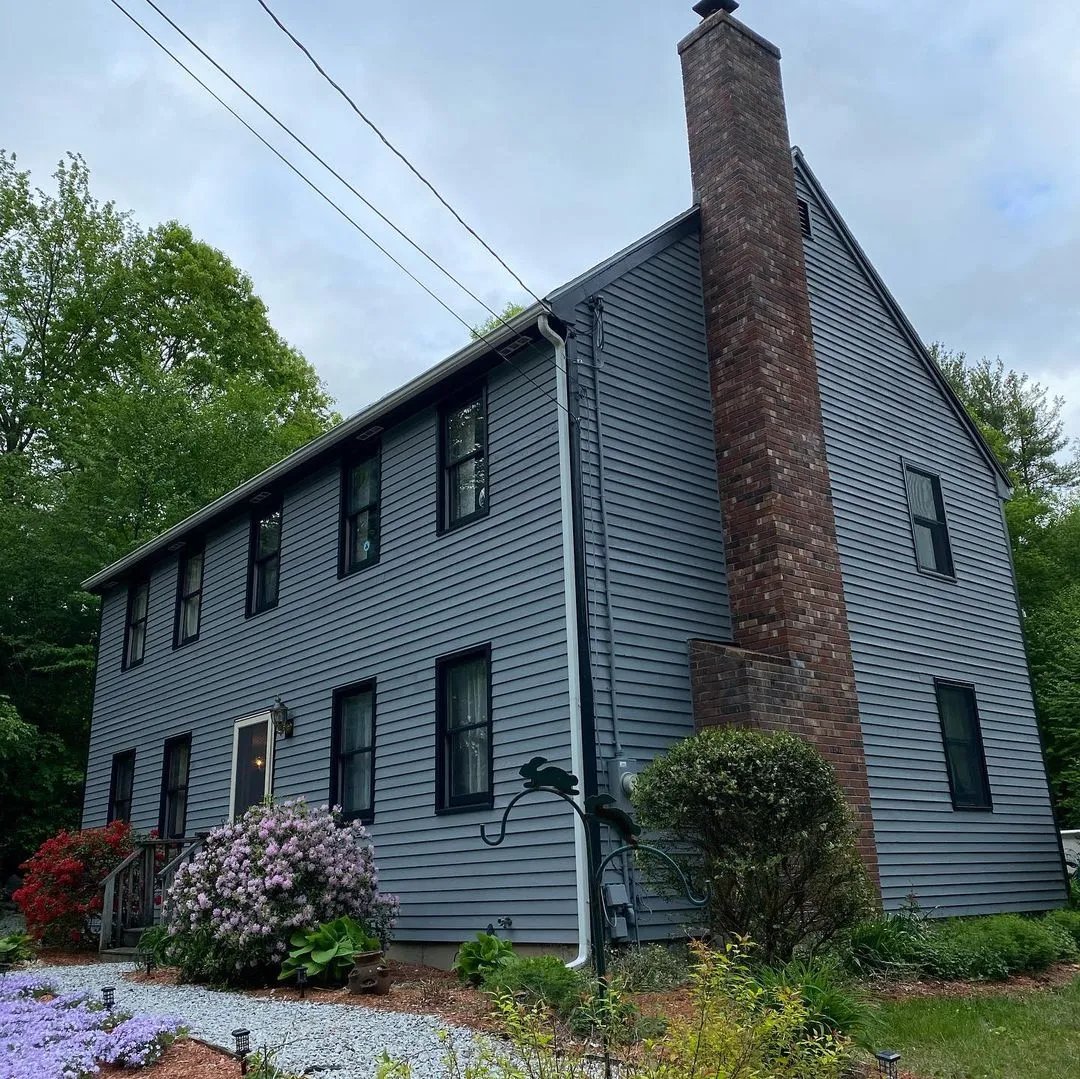
An exterior sample on one convenient patch cannot represent every side of a house. Sun, shade, roof overhangs, and nearby planting alter the way a color appears. Choose representative locations and compare the proposed finish with permanent materials rather than evaluating it against an isolated white board.
Keep the candidate group small enough to compare clearly and label each sample. Review it at different times of day from normal viewing distances. For substrates with color or coating restrictions, verify the exact product combination before approving appearance alone.
Record the chosen color, sheen, product, and locations where it was reviewed. If siding and trim are changing together, sample their relationship rather than making two independent decisions. Preserve the approved reference during the project. A phone photograph can help track the options, but the physical sample outdoors remains the reliable basis for deciding how the finished house should look.
Make the approval sample answer a specific question
Decide what you need to learn from a sample before making it. Color, adhesion, stain blocking, texture matching, and cleaning response are separate questions. A tiny decorative swatch may answer the first while providing little evidence about the others. Choose a location or material that represents the uncertainty you actually face.
Document the trial in a short sequence: existing condition, cleaning, repair or preparation, primer if specified, finish, and evaluation time. Use the same tools and products planned for the wider job. If a stage changes, repeat the sample so approval still refers to the real system.
Inspect after the manufacturer’s required interval and under the lighting that matters to the space. Record whether the result was accepted and what limitations remain. For example, a successful color trial on smooth scrap does not prove that an old textured wall will look identical. Keep the approved reference available until handover. This makes the sample a practical decision tool and avoids treating an attractive wet patch as proof that every preparation question has been resolved.
Review color from the positions where the space is used
Place the sample where it can be seen from a doorway, a seat, and the main walking route. These positions may reveal different reflections and surrounding colors. A choice made while standing directly in front of a brightly lit swatch can overlook the way the finish appears during everyday use.
Make the review repeatable. Note the sample name, location, time of day, and lighting setting. Compare it beside fixed materials such as floors, counters, roofing, or trim, depending on the project. If those materials will change, coordinate samples instead of approving each decision in isolation.
Use the intended sheen and a sufficiently representative area where practical. Cameras and screens can help document the options but should not replace the physical comparison. Once a sample is accepted, keep it available until completion and record the exact formula and finish. That reference makes later questions easier to resolve and prevents a similar-looking chip from being substituted simply because nobody can remember which sample was approved in the real setting.
Compare sheltered and exposed sides separately
The same finish can age differently around one building. A wall facing strong sun may show different wear from a shaded wall near vegetation. An overhang can protect one area while concentrating drips at its edge. Make a simple elevation-by-elevation inspection instead of assuming that every surface needs the same level of preparation.
Record the type of deterioration, not just whether the color looks faded. Look for chalking, peeling, dirt accumulation, moisture patterns, and damage around joints. These observations help determine whether the task is cleaning, localized repair, or a broader repaint. Avoid choosing a stronger cleaning method for a shaded area without first checking the material and condition.
Plan coating and drying around each surface’s actual conditions. Shade can delay drying, while direct sun can change working time. Follow the selected product’s limits and adjust the work sequence accordingly. During future maintenance, revisit the areas that showed the earliest problems. A targeted inspection plan is more useful than assuming a uniform repaint interval for every face of the property.
Respect the material and layout of siding
Identify the siding rather than treating every wall as the same substrate. Wood, fiber cement, vinyl, metal, and manufactured panels have different preparation and coating requirements. Look for manufacturer information and previous product records. If the material is uncertain, verify it before selecting a finish or applying an aggressive cleaner.
Inspect the joints, lower edges, fasteners, and areas around penetrations. Damaged or loose components may need repair before painting. Preserve drainage details and movement gaps; a visually continuous coating is not a reason to seal every opening. Plan how each board or panel will be coated without leaving arbitrary stopping marks in the middle of a prominent surface.
Follow the manufacturer’s guidance for coating compatibility, color restrictions, and preparation. A finish that works on one siding material may be inappropriate for another. Use a test area when adhesion or appearance is uncertain. During the final inspection, look along the siding from both directions to check coverage on exposed edges and profiles, while confirming that functional joints and openings remain clear.
Treat vinyl color and coating choices as a system
Vinyl siding needs special consideration before a color change. Start with the siding manufacturer’s requirements and the coating manufacturer’s compatibility guidance. The condition of the panels also matters: painting is not a repair for distorted, loose, or failing siding. Inspect those issues before choosing a finish.
Color selection cannot be separated from heat and material performance. Sherwin-Williams explains why vinyl-compatible color choices matter. Use an approved product and color combination for the specific substrate rather than assuming any darker color is acceptable. Check warranty implications directly with the relevant manufacturer.
Clean with a method that does not damage panels or drive water behind them, and allow the required drying conditions. Preserve panel movement, drainage paths, and joints. A trial area can help evaluate appearance and preparation, but it does not override a manufacturer’s restriction. Record the exact product and color used so future maintenance does not substitute an incompatible finish simply because it looks similar on a color card.
Schedule exterior work around surface conditions
A clear forecast is only one part of an exterior painting decision. The surface itself must meet the coating’s requirements, and conditions need to remain suitable for the specified drying period. Morning dew, a shaded wall, direct sun, and an approaching temperature change can make different sides of the same building behave differently.
Use the technical data for the selected product to establish acceptable temperature, moisture, and weather limits. Do not apply a universal rule based on the season or the calendar. A warm afternoon does not cancel a cold night, and a surface can remain damp after the surrounding air feels comfortable.
Build flexibility into the schedule. Plan which elevation can be worked on safely and effectively at each stage, and identify where work can stop at a natural boundary. Keep a clear arrangement for postponements rather than treating a weather delay as a reason to rush preparation or recoating. Record unusual conditions if a problem develops later. The best schedule is one that supports the coating system and the actual building, not just a promised start date.
Keep a useful record for future maintenance
Save more than the color name. Record the manufacturer, product line, sheen, color formula or code, and the surface where each product was used. Note the primer and any special preparation that mattered. A photograph of the label can be useful, but keep a readable written copy as well so the information is not lost among unrelated pictures.
Create a simple room or surface map. Similar whites on a ceiling, wall, and baseboard can become difficult to distinguish months later. Label leftover containers clearly and store them according to their instructions, away from children and unsuitable temperatures. Do not combine unidentified leftovers in an effort to save space.
Add the completion date, agreed care instructions, and any areas that need monitoring. A recurring stain or peeling patch may point to a condition beyond the coating itself. Records help a future contractor understand what has already been tried. They also make small repairs more efficient, although stored paint and a matching formula cannot guarantee an invisible touch-up after the surrounding finish has aged.
Review completion in an organized route
Bring the agreed scope and sample references to the walkthrough. Start in one location and move systematically so small details do not disappear inside a general impression of the room or property. Give finishes their appropriate drying time and use ordinary lighting and viewing positions to judge appearance.
Check the broad surfaces first, then edges, profiles, transitions, and functional components. Note missed work, unwanted residue, damage, or uneven finish with a precise location. Compare any concern with the preparation standard and limitations discussed before work, rather than expecting an old substrate to have changed beyond the agreed scope.
Collect the observations into one list and discuss the proposed corrections. Ask whether a spot treatment will blend and what protection or waiting period follows the repair. Confirm cleanup, operation, product records, and care instructions before closing out the project. An organized review gives both the owner and the contractor a concrete basis for completion and reduces the chance that returning furniture hides an issue that was still easy to inspect and resolve.
Planning your next step
Use the inspection notes and sample decisions from this guide to describe the work you want completed. Bring photographs of uncertain areas and list the surfaces that should be included before comparing estimates. For broader background, read our The Ultimate Guide to Exterior House Painting in 2022, or review AK Painters Pro Corp.’s services.
When you are ready to discuss the scope, request a free estimate. Related reading: