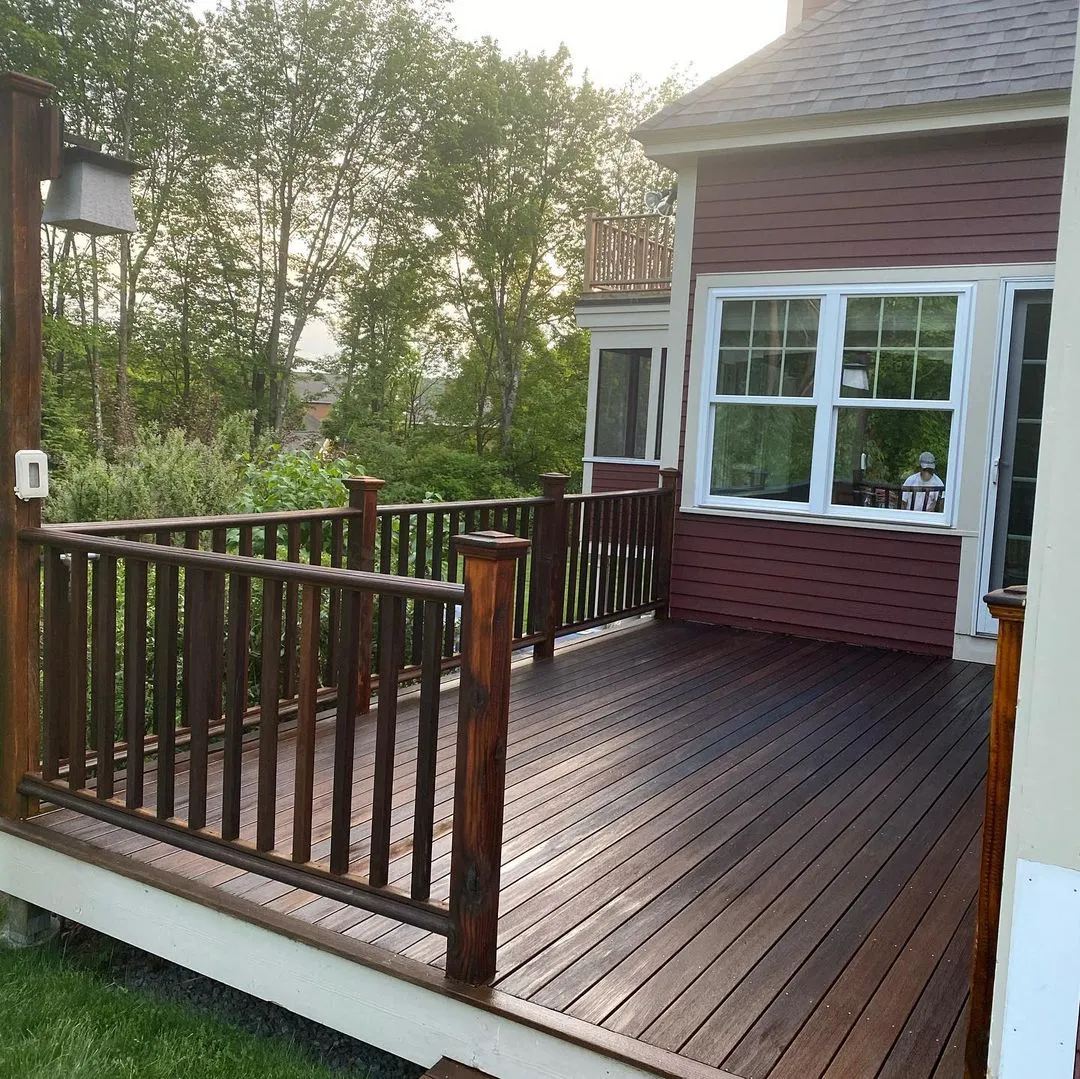
Cleaning a deck for ordinary use and cleaning it before staining are related but different scopes. Before the visit, identify the planned finish system and the existing coating. The cleaning method should support the preparation requirements of that system rather than merely brighten the boards.
Inspect the deck’s condition and resolve unsafe or deteriorated components before work. Protect surrounding property and follow compatible cleaner and equipment guidance. After cleaning, reassess the dry surface for remaining coating, damaged fibers, and uneven areas that need further preparation.
Confirm readiness through the selected finish’s requirements, including moisture conditions, rather than a fixed waiting period. Use a representative stain sample once preparation is complete. Keep the cleaning and preparation record with the finish details so later maintenance has a clear history. This creates a useful handoff between cleaning and staining and reduces the risk of coating a surface that looks clean but is not suitable for the next stage.
Clean a deck without damaging the wood or coating
Start by identifying the deck material and any existing finish. Remove movable belongings and loose debris, then inspect for damaged boards, unstable rails, and exposed fasteners. Resolve unsafe conditions before cleaning. A dirty surface may hide deterioration, so the initial walkthrough is part of the work rather than a separate formality.
Select a cleaning product and method compatible with the wood or manufactured material and the coating, if one remains. Test a discreet area. Avoid assuming that a stronger concentration or higher pressure will save time; unsuitable methods can damage fibers, coatings, and nearby landscaping. Follow product instructions for protection, application, rinsing, and runoff.
Let the surface dry before evaluating the result. If refinishing is planned, follow the finish manufacturer’s moisture and preparation requirements rather than judging readiness by appearance alone. Inspect edges and spaces where debris holds water. Return furniture only when appropriate, and adjust items that trap moisture or scrape the surface. Cleaning works best as part of an ongoing care plan for the deck’s actual materials.
Inspect a deck before treating its appearance
Begin with the deck’s condition, not the stain color. Check accessible boards, steps, rails, fasteners, and areas near the building for visible damage or looseness. If anything seems unstable, soft, or structurally questionable, have it assessed before cleaning or finishing. A new coating cannot make an unsafe component sound.
Look for places where water or debris collects, including under planters and furniture. Note differences between shaded sections, open areas, and covered portions. These conditions can affect preparation and maintenance. Identify the previous coating if possible, because compatibility and removal needs influence the project more than a color card does.
Define the included surfaces: walking boards, risers, railings, posts, lattice, and exposed ends may not all be part of the same estimate. Decide how people will enter the home while the deck is unavailable. Once repair and access issues are resolved, follow the selected product’s preparation and moisture requirements. Keep inspection notes for later maintenance so the same vulnerable areas receive attention before deterioration becomes widespread.
Read the construction before choosing a wood finish
Look at an accessible underside, back edge, or manufacturer label to understand how the item is made. A decorative face may cover a thin veneer or a manufactured core. Broad sanding or chemical removal can be inappropriate even when the visible surface has a convincing wood grain. Resolve that uncertainty before deciding on tools.
Make a condition note for each distinct component. Include replacement boards, filled holes, loose joints, and any area with a different existing coating. This helps explain why one stain sample cannot represent the whole project. If the history is unknown, an experienced refinisher can help determine what assessment is appropriate without sacrificing a prominent face.
Keep the material findings connected to the desired appearance. A transparent finish leaves the substrate visible, including characteristics that an opaque coating might conceal. Decide whether those differences belong in the result and sample accordingly. Stop if preparation reveals lifting veneer or unstable material. Finishing is the last stage of improving a suitable component; it should not be used to disguise a construction problem that still needs repair.
Inspect the prepared wood before applying color
Once cleaning and appropriate preparation are complete, pause before opening the stain. View the surface from an angle and look for scratches, glue residue, compressed fibers, and unevenly treated patches. Color can make these features more visible, so the inspection is most useful while corrections are still part of preparation.
Compare broad faces with edges and profiles. Where sanding is suitable, the sequence should be consistent and appropriate to the construction. Thin veneer and delicate details require restraint. Resolve coating-history and hazardous-material concerns before disturbing unknown or older finishes, and use suitable dust-control methods for the actual task.
Clean the prepared surface as the finish manufacturer directs, then make the representative trial. If the sample reveals uneven absorption, investigate the preparation instead of immediately adding more stain. Record any revised method and apply it consistently across comparable components. This checkpoint helps keep the final color decision connected to the quality of the substrate, rather than expecting the stain to conceal differences introduced by the work that came before it.
Schedule exterior work around surface conditions
A clear forecast is only one part of an exterior painting decision. The surface itself must meet the coating’s requirements, and conditions need to remain suitable for the specified drying period. Morning dew, a shaded wall, direct sun, and an approaching temperature change can make different sides of the same building behave differently.
Use the technical data for the selected product to establish acceptable temperature, moisture, and weather limits. Do not apply a universal rule based on the season or the calendar. A warm afternoon does not cancel a cold night, and a surface can remain damp after the surrounding air feels comfortable.
Build flexibility into the schedule. Plan which elevation can be worked on safely and effectively at each stage, and identify where work can stop at a natural boundary. Keep a clear arrangement for postponements rather than treating a weather delay as a reason to rush preparation or recoating. Record unusual conditions if a problem develops later. The best schedule is one that supports the coating system and the actual building, not just a promised start date.
Compare stain samples through a repeatable sequence
Use several representative pieces or discreet locations when the project contains different boards or repairs. Label each sample with its preparation and product details. Without those notes, the most attractive result can become impossible to reproduce once the samples are moved around or the containers are put away.
Prepare and finish the samples through the actual proposed system. Include any compatible conditioner and topcoat required by that system, following their timing instructions. Keep application methods consistent so you are comparing materials or colors rather than accidental differences in technique.
Review the dry samples together in the intended setting. Check broad grain, end grain, and repaired areas, and note which variation is acceptable. If the result is unsuitable, adjust the system through manufacturer guidance before extending it to the project. Retain a sample as a reference for application and later maintenance. It should show what was approved on real wood, while recognizing that a natural material will not become identical from board to board merely because the same stain is used.
Choose stain opacity with the existing surface in mind
Stain opacity controls how much wood variation remains visible. A more transparent appearance emphasizes grain and differences between boards, while a more opaque finish covers more of that variation. Product terms differ, so compare actual samples and technical information instead of assuming that two manufacturers use the same labels in the same way.
Start with the surface you have. Existing coatings, weathering, repairs, and mixed boards influence what a new stain can achieve. Moving to a more transparent result may require substantial preparation and may not be practical for every substrate. Do not expect a transparent coat to hide filler, previous paint, or uneven discoloration.
Evaluate the sample after the full system has dried. Consider appearance alongside maintenance requirements and suitability for the exposure. A deck floor, a fence, and interior furniture may require different products even when the color looks similar. Keep the final choice specific: manufacturer, product, opacity, color, and intended surface. That record helps avoid an incompatible substitution when only part of the work needs attention later.
Coordinate final cleaning with newly completed finishes
Newly painted, stained, or installed surfaces may not tolerate their normal cleaning routine immediately. Obtain the product-specific timing and care instructions before scheduling a final clean. Distinguish removal of loose work debris from washing a fresh coating. A surface can look finished while still needing protection from moisture, pressure, or adhesive materials.
Complete remaining dusty work and remove construction waste that falls outside ordinary cleaning first. Then use suitable tools to clean accessible surfaces without redistributing grit. Protect edges, hardware, and delicate materials, and keep products away from incompatible neighboring finishes. Do not scrape unexplained marks from new glass or stone without checking the manufacturer’s guidance.
Inspect the space before returning furnishings or opening it to normal traffic. Confirm that surfaces are dry, routes are clear, and no cleaning residue remains where it should have been removed. Record any defects that require the finishing contractor rather than attempting an improvised repair during cleaning. A coordinated final clean preserves the new work and makes the handover easier to assess.
Planning your next step
Use the inspection notes and sample decisions from this guide to describe the work you want completed. Bring photographs of uncertain areas and list the surfaces that should be included before comparing estimates. For broader background, read our How to Stain Wood the right way, or review AK Painters Pro Corp.’s services.
When you are ready to discuss the scope, request a free estimate. Related reading: