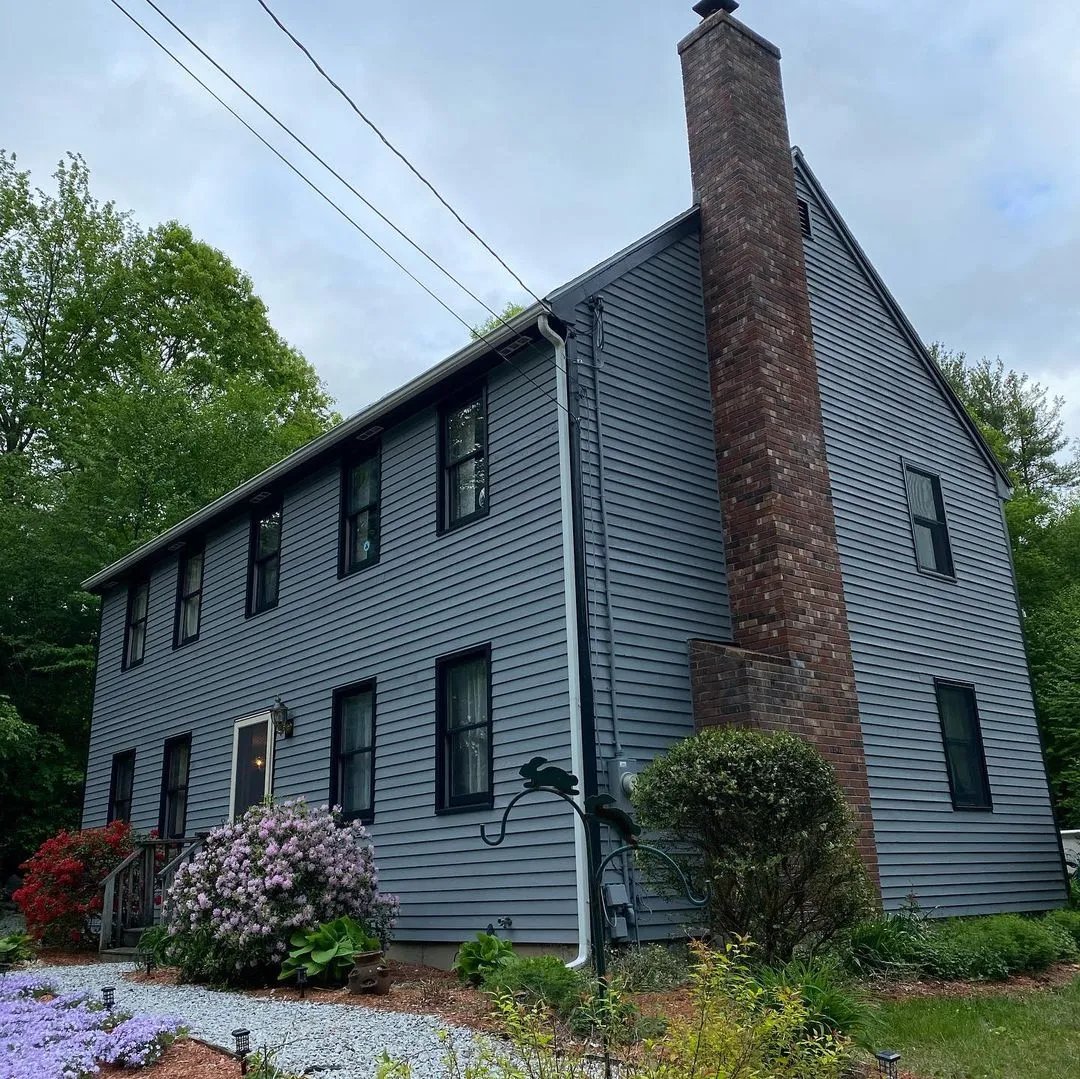
Exterior gaps are not all the same. Some are appropriate sealant joints, while others support drainage, ventilation, or movement. Before a repaint, identify the assembly and the purpose of each joint rather than treating every visible line as something to close.
Look at failed or separated sealant around suitable locations and inspect the surrounding material for moisture damage. Have uncertain window, siding, and roof-related details assessed through the relevant manufacturer or professional. A neat bead over an unresolved building problem can conceal the evidence without correcting it.
Specify compatible sealants and their paint-ready requirements where joint treatment belongs in the scope. Remove failed material appropriately and preserve the shape of trim details. During inspection, check both the appearance and the openings deliberately left functional. Keep that distinction in the project record so later maintenance does not undo a correct drainage or movement detail in pursuit of a visually continuous surface.
Treat gaps according to their purpose
Not every visible gap should be filled. Some joints allow movement, drainage, or ventilation, and sealing them can create problems. Identify whether the gap is a cosmetic trim joint, a moving connection, or part of the assembly’s intended function. If that purpose is uncertain, ask before closing it with caulk or paint.
For a suitable paintable joint, select a sealant compatible with both surfaces and the planned coating. Remove failed material using a method appropriate to the substrate, and follow the product’s requirements for clean, dry contact surfaces and joint dimensions. A bead spread over loose paint does not create a sound repair beneath it.
Shape the joint neatly without smearing unnecessary material across surrounding details. Allow the specified cure or paint-ready interval before finishing. Painting too early can create cracking or other appearance problems, and a product described as paintable may still have timing restrictions. Review the dried result before moving on. Good caulking should resolve the appropriate joint while preserving crisp profiles, moving parts, and any openings that must remain functional.
Respect the material and layout of siding
Identify the siding rather than treating every wall as the same substrate. Wood, fiber cement, vinyl, metal, and manufactured panels have different preparation and coating requirements. Look for manufacturer information and previous product records. If the material is uncertain, verify it before selecting a finish or applying an aggressive cleaner.
Inspect the joints, lower edges, fasteners, and areas around penetrations. Damaged or loose components may need repair before painting. Preserve drainage details and movement gaps; a visually continuous coating is not a reason to seal every opening. Plan how each board or panel will be coated without leaving arbitrary stopping marks in the middle of a prominent surface.
Follow the manufacturer’s guidance for coating compatibility, color restrictions, and preparation. A finish that works on one siding material may be inappropriate for another. Use a test area when adhesion or appearance is uncertain. During the final inspection, look along the siding from both directions to check coverage on exposed edges and profiles, while confirming that functional joints and openings remain clear.
Keep window drainage and movement working
Window finishing requires more than a neat line beside the glass. Identify the frame material, moving parts, weatherstripping, drainage openings, and manufacturer’s restrictions before preparing the surface. Paint must not block channels that manage water or bond components that need to move. If the window’s condition is uncertain, assessment comes before cosmetic work.
Clean accessible surfaces with a method appropriate to both the frame and glass. Avoid flooding joints or introducing cleaner into hardware. On older windows, investigate coating hazards before scraping or sanding. Repair needs such as soft material, failed glazing, or water entry should be distinguished from the painting scope.
Use the specified system for the actual substrate, and protect seals and operating surfaces. Allow adequate drying before moving or closing parts, following the relevant instructions. Check the window’s operation after the work and inspect the finish with daylight behind it, which can reveal missed edges. Keep a record of what was painted and what was deliberately left clear. Function and drainage are as important as the visible result.
Give exposed trim edges and joints special attention
Exterior trim often fails first at details rather than across its broad face. Inspect lower edges, end grain, horizontal ledges, joints, and places where water can linger. Note whether nearby gutters, roofing, or flashing direct water toward the area. Coating the face alone cannot correct a source of repeated wetting.
Have unsound material and water-entry problems assessed before painting. Cosmetic filler is not a substitute for a sound component. Once the substrate is suitable, follow the selected system’s instructions for preparation, priming, and coating exposed edges. Different trim materials may require different products even when they will share the same visible color.
Keep drainage openings and intentional movement joints functional. Use appropriate sealant only where the assembly calls for it, and respect the paint-ready time. Inspect the finished trim from below and from ordinary approach routes, since ledges and undersides can be easy to miss. Record areas that need ongoing observation, especially where exposure is heavier. Maintenance should include checking the building details that affect the trim, not just the paint film.
Resolve moisture causes before covering the evidence
A stain, blister, or peeling edge can be a symptom rather than the main problem. Look at the location and pattern. Damage below a window, along a ceiling joint, or near plumbing deserves a different investigation from a scuff caused by a chair. Repainting may conceal a mark temporarily without correcting the condition that produced it.
Have leaks, recurring condensation, or other suspected moisture sources assessed and corrected before finishing. Let affected materials reach the condition required by the repair and coating products. Surface appearance alone is not a reliable way to decide that a previously wet assembly is ready. Where necessary, the appropriate trade should verify the repair and drying plan.
Once the cause is addressed, evaluate whether the substrate remains sound. Soft, swollen, crumbling, or persistently contaminated materials may need work beyond cosmetic painting. A suitable stain-blocking system can address a residual mark on a sound surface, but it is not a substitute for correcting active moisture. Keep photographs and watch the area after the project so a returning pattern is recognized early.
Define exactly what will be finished
A useful project description names the surfaces instead of relying on the name of the room. Walls, ceilings, baseboards, window casings, doors, and built-in shelves may need different preparation and different coatings. Walk through the space and list each item that belongs in the job. Identify both faces of doors, closet interiors, and the edges that are visible only when something is opened.
Separate appearance changes from repairs. A color change on sound paint is different from work on peeling layers, damaged drywall, or water-stained trim. Mark uncertain areas for inspection before deciding how much finishing work is reasonable. Photographs taken in normal daylight can help you remember the condition and discuss it consistently.
Keep a second list of exclusions. Furniture refinishing, electrical work, leak repairs, and moving large appliances should never become assumed tasks simply because they are near a painted surface. With clear boundaries, you can compare estimates and evaluate the finished result against the same expectations. It also becomes easier to divide a larger improvement into manageable stages.
Make the approval sample answer a specific question
Decide what you need to learn from a sample before making it. Color, adhesion, stain blocking, texture matching, and cleaning response are separate questions. A tiny decorative swatch may answer the first while providing little evidence about the others. Choose a location or material that represents the uncertainty you actually face.
Document the trial in a short sequence: existing condition, cleaning, repair or preparation, primer if specified, finish, and evaluation time. Use the same tools and products planned for the wider job. If a stage changes, repeat the sample so approval still refers to the real system.
Inspect after the manufacturer’s required interval and under the lighting that matters to the space. Record whether the result was accepted and what limitations remain. For example, a successful color trial on smooth scrap does not prove that an old textured wall will look identical. Keep the approved reference available until handover. This makes the sample a practical decision tool and avoids treating an attractive wet patch as proof that every preparation question has been resolved.
Inspect the result before putting everything back
Inspect the finished work under normal room lighting and from ordinary viewing positions. Look for missed edges, drips, uneven coverage, debris in the finish, and damage to neighboring surfaces. Check corners, the backs of accessible edges, and areas revealed when a door or drawer opens. Give the coating its appropriate drying time before judging the final appearance.
Separate workmanship concerns from underlying surface limitations that were discussed before work began. An old wall with a modest preparation scope will not necessarily resemble newly installed drywall. Comparing the result with the approved sample and written scope keeps the conversation specific and useful.
Make one clear list of items to review. Photographs and location notes are better than a vague statement that something “does not look right.” Discuss whether a spot repair will blend or whether a complete plane needs another coat. Finish by confirming that hardware functions, coverings are removed, and the care instructions are understood. A careful walkthrough is an opportunity to resolve details while the work and materials are still easy to identify.
Planning your next step
Use the inspection notes and sample decisions from this guide to describe the work you want completed. Bring photographs of uncertain areas and list the surfaces that should be included before comparing estimates. For broader background, read our The Ultimate Guide to Exterior House Painting in 2022, or review AK Painters Pro Corp.’s services.
When you are ready to discuss the scope, request a free estimate. Related reading: