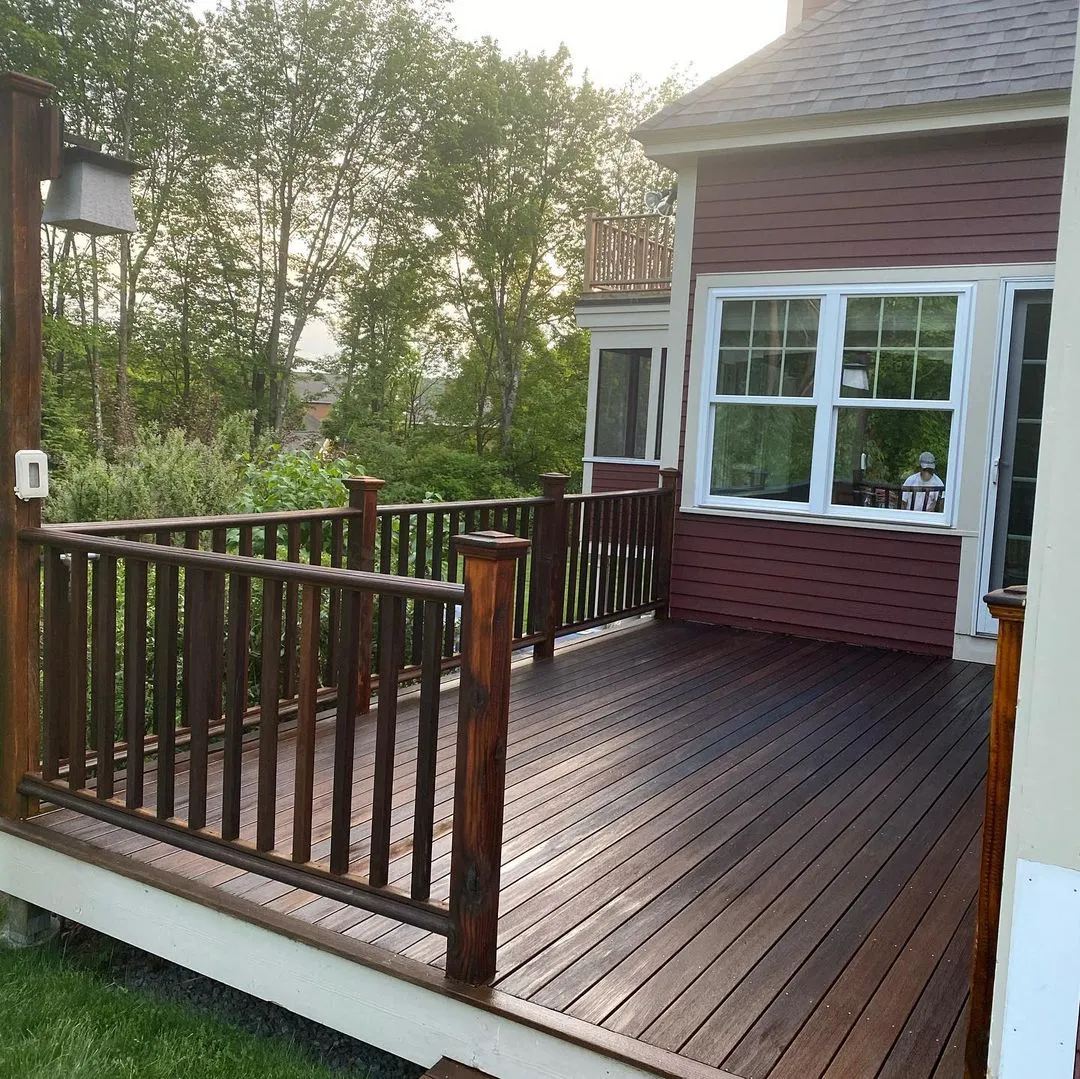
Deck railings and walking boards may need attention at different times because their exposure and wear differ. Inspect the posts, balusters, handrails, and floor separately before deciding on a full-deck project. Confirm that every component is sound before planning a cosmetic finish.
If only the railings are being stained, protect the existing floor and clarify accessible faces and edges. Match or coordinate the appearance through physical samples, recognizing that aged deck boards may not look identical to a newly finished rail. Verify product suitability for each surface instead of using one finish merely for convenience.
Plan application so wet components do not block the only safe route through the space. Check lower edges and recesses for excess material and follow handling guidance before normal use resumes. At handover, inspect from both inside and outside the deck. Keep separate product and maintenance records if the rails and floor receive different systems or are finished at different times.
Inspect a deck before treating its appearance
Begin with the deck’s condition, not the stain color. Check accessible boards, steps, rails, fasteners, and areas near the building for visible damage or looseness. If anything seems unstable, soft, or structurally questionable, have it assessed before cleaning or finishing. A new coating cannot make an unsafe component sound.
Look for places where water or debris collects, including under planters and furniture. Note differences between shaded sections, open areas, and covered portions. These conditions can affect preparation and maintenance. Identify the previous coating if possible, because compatibility and removal needs influence the project more than a color card does.
Define the included surfaces: walking boards, risers, railings, posts, lattice, and exposed ends may not all be part of the same estimate. Decide how people will enter the home while the deck is unavailable. Once repair and access issues are resolved, follow the selected product’s preparation and moisture requirements. Keep inspection notes for later maintenance so the same vulnerable areas receive attention before deterioration becomes widespread.
Pay attention to end grain and exposed board edges
The ends and edges of wood components often behave differently from the broad faces. On exterior structures, these areas may receive concentrated moisture and wear. On stained furniture or trim, they may absorb color differently. Inspect them deliberately rather than treating them as leftover details after the main surface is finished.
Follow the coating manufacturer’s instructions for the particular wood and exposure. Some systems call for special attention to cut ends or other vulnerable locations. Do not assume that adding a very heavy coat is an appropriate solution; excess material can dry or perform poorly. Test appearance where end grain will be visible.
Plan the work so edges can be reached without handling wet faces or standing on a newly finished surface. If components are inaccessible, clarify the limitation in the scope rather than suggesting that all sides have been treated. During the walkthrough, check rail ends, board tops, door edges, and similar details. A finish looks more complete when these transitions are intentional, and maintenance is easier when vulnerable locations are known.
Keep brushed edges controlled and consistent
Use a brush suited to the coating and the size of the detail. A large brush that is efficient on broad trim may be awkward around a narrow profile, while a very small brush can make a long edge slow and uneven. Check the manufacturer’s tool recommendations and practice on the approved sample before working in a prominent location.
Load enough material to keep the stroke flowing without flooding corners. Follow the shape of the component and watch for accumulations on lower edges, inside profiles, and around joints. Work systematically so that adjoining wet areas meet cleanly. Repeatedly brushing a finish as it starts to set can leave more marks than it removes.
Protect neighboring materials using an appropriate combination of careful technique and compatible masking. Review edges after the required drying time rather than trying to correct every reflection in wet paint. If sanding or other preparation is needed between coats, follow the coating instructions and the surface’s safety requirements. A neat brushed edge comes from preparation, suitable tools, and timing, rather than pressure or speed alone.
Compare the appearance and maintenance of stain systems
Start by deciding which characteristics of the wood you want to see after finishing. Grain, old repairs, contrasting boards, and weathering will influence the result more strongly in a transparent system. If those differences are unwelcome, review more opaque options that are approved for the surface rather than assuming transparent stain can hide them.
Compare samples using the manufacturer’s actual product descriptions. Terms such as translucent, semi-transparent, and solid do not guarantee identical behavior across brands. Confirm whether the finish is intended for horizontal traffic surfaces, vertical exterior wood, or interior use, and review any topcoat requirements or restrictions.
Discuss the next maintenance cycle before making the final choice. Preparation for a future refresh may differ between systems, particularly if the existing finish begins to fail. Keep the selected product, opacity, and sample recorded together. The best choice balances the appearance of the wood you have with a maintenance approach you understand. A color alone is not a complete specification and should not become the basis for an unverified substitution later.
Test stain on representative wood, not just a color card
The same stain can look different on different boards. Species, grain, previous treatment, weathering, and preparation all affect absorption and appearance. Use an inconspicuous part of the actual piece or a genuinely matching sample when possible. A store display gives a direction, but it cannot show every characteristic of your wood.
Prepare the trial exactly as the project will be prepared. Changing the sanding sequence or skipping a planned conditioner can change the result. Include the intended topcoat where the system requires one, since a clear finish can alter the final appearance. Follow all product directions for application, excess removal, and evaluation time.
Compare the dry sample in the light where the finished surface will be seen. Look at both broad color and local variation around grain, end grain, and repairs. If several boards are involved, sample more than one representative condition. Keep the approved piece or location available during application. It becomes a practical reference for consistency, while allowing for natural differences that no transparent finish can completely erase.
Set up protection around the way work will move
Trace the route from the entrance to the work area before laying coverings. Identify where tools turn corners, where parts will be stored, and where people need to pass. Protection should remain stable under those movements instead of becoming a loose obstacle that shifts each time something is carried through.
Match coverings to the risk. Dust containment, spill protection, and support for removed components are different needs. Test any adhesive product on a discreet compatible area and follow its removal timing. Delicate flooring, fresh coatings, wallpaper, and aged finishes may need another approach.
Check protection at each change of stage. Preparation debris should not remain where it can be dragged across finished surfaces during reassembly. Keep fittings, controls, labels, and moving parts free from coating as appropriate, and label hardware that is removed. Before normal use resumes, inspect the protected surfaces and remove coverings carefully. A good setup does more than catch the first drip; it remains useful through repairs, application, drying, cleanup, and the movement of belongings back into place.
Apply deck finishes with a usable exit route
Plan the application sequence before the first board is coated. Decide where materials will sit, how sections will connect, and how you will leave without crossing wet finish. Stairs, gates, and doors can turn a seemingly simple deck into a difficult access problem. Keep the route unavailable to people and pets until the product allows use.
Follow the finish manufacturer’s instructions for tools, coverage, and maintaining a working edge. Work along complete boards or another suitable natural boundary where practical. Avoid puddles and accumulations around fasteners, board ends, and recessed details. A thicker layer does not automatically provide more protection and may create uneven appearance or drying problems.
Watch conditions as the work moves across sun and shade. Stop when the surface or weather no longer meets the product’s limits. After the required drying period, inspect transitions and edges before returning furniture. Follow separate guidance for foot traffic and heavier objects. Record the system and completion conditions so future maintenance can be planned around the actual finish rather than a guessed annual schedule.
Maintain stained surfaces according to their exposure
Stained surfaces need observation as well as cleaning. Check where sunlight, standing objects, water, and abrasion concentrate. A horizontal deck board may show wear sooner than a sheltered vertical rail, even when both received the same product. Use those differences to guide inspection rather than assuming every component needs identical treatment at the same time.
Clean with methods compatible with the finish and substrate. Avoid introducing a strong cleaner or pressure setting simply because the surface is outdoors. Remove debris that holds moisture, and keep furniture or containers from scraping or trapping water against the finish. Follow the product’s instructions before applying any maintenance coat.
Before recoating, identify whether the existing finish is sound, worn, or failing. Those conditions may require different preparation. A maintenance coat over loose or incompatible material can create a larger problem. Save the original product records and a photograph of the approved color. If a replacement product is necessary, verify compatibility and sample the result rather than treating a similar color name as proof that the systems are interchangeable.
Planning your next step
Use the inspection notes and sample decisions from this guide to describe the work you want completed. Bring photographs of uncertain areas and list the surfaces that should be included before comparing estimates. For broader background, read our How to Stain Wood the right way, or review AK Painters Pro Corp.’s services.
When you are ready to discuss the scope, request a free estimate. Related reading: